Create an experiment
A DATALAB experiment moves through seven steps, from selecting vehicles to naming and starting the job. The wizard keeps the full sequence visible on the left, and you can return to an earlier step before checkout.
| Step | What you do |
|---|---|
| Select Vehicles | Choose the vehicles and date range to draw data from |
| Select Input File Type | Choose one type of file, then pick the files |
| Select Analysis Type | Choose what to do with those files |
| Confirm File Selection | Review the file list and remove anything you do not want |
| Data Reduction | Optionally narrow the data down |
| Configure Analysis | Set output options and format |
| Checkout | Name the experiment and start it |
To begin, open Analytic tools > DATALAB Results and click New Experiment +.
Step 1: Select Vehicles
Choose the vehicles you want to use data from. Only files in the date range you set here are available to the experiment.
- Set Min Date and Max Date to the range you want.
- Optionally narrow the list further using Vehicles, Fleet, and Package.
- Select the check box beside each vehicle you want to include.
- Click Next.
The page shows a running count of how many vehicles you have selected.
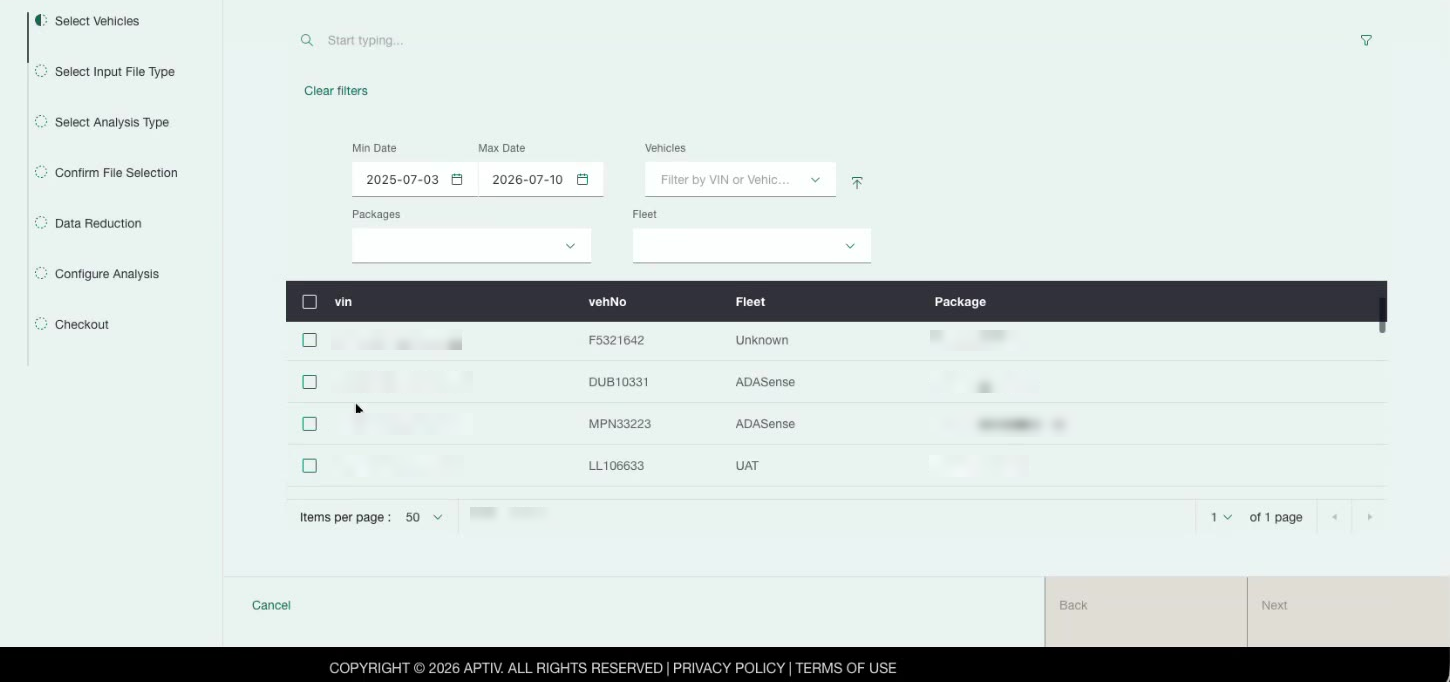
The date range you set here limits which files the experiment can use, not just which vehicles appear in the grid. If you expect a file to be available later in the wizard and it is not there, check this date range first.
Step 2: Select Input File Type
Choose the kind of file this experiment works with, then pick the specific files.
Select one of the following from Select file type:
| File type | Available filters |
|---|---|
| Event files | Event Name, Event Type, Event Status |
| Trip detail files | Custom parameter conditions |
| DTC files | DTC Name, DTC Type, DTC Status |
| Charge Trip files | None |
| CAN log files | None |
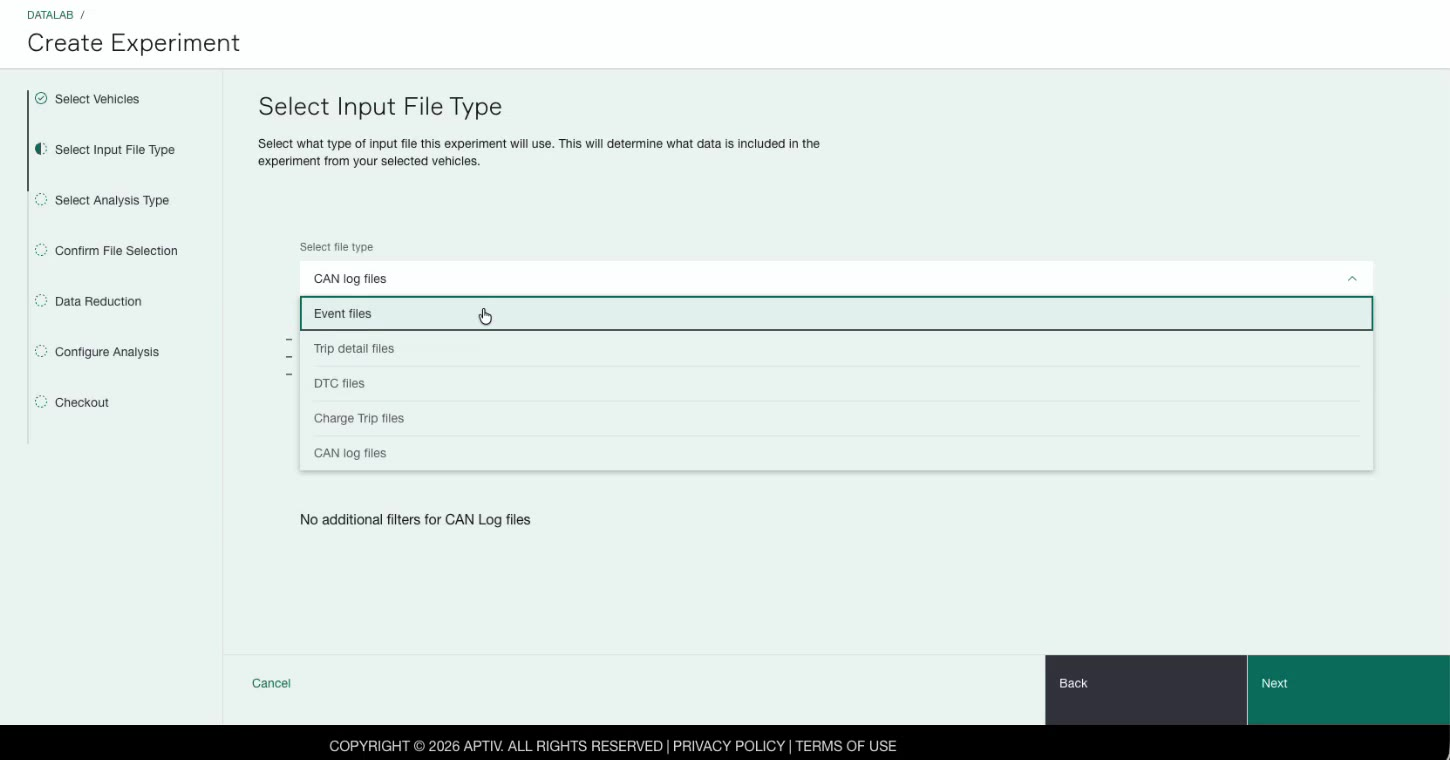
You cannot mix file types in a single experiment. If you have already added files and then change the file type, your selection is cleared and you have to add files again. Decide what kind of file you need before you start adding.
Add event files or DTC files
- Choose Event files or DTC files from Select file type.
- Use the search box to find what you want, then select it in the Event Name, Event Type, or Event Status grid. DTC files use DTC Name, DTC Type, and DTC Status.
- Click Add Selected Files to Experiment.
If you select criteria in more than one grid, a file has to match all of them to be added.
The heading above the grids shows Number of event files in the experiment, so you can confirm files were actually added.
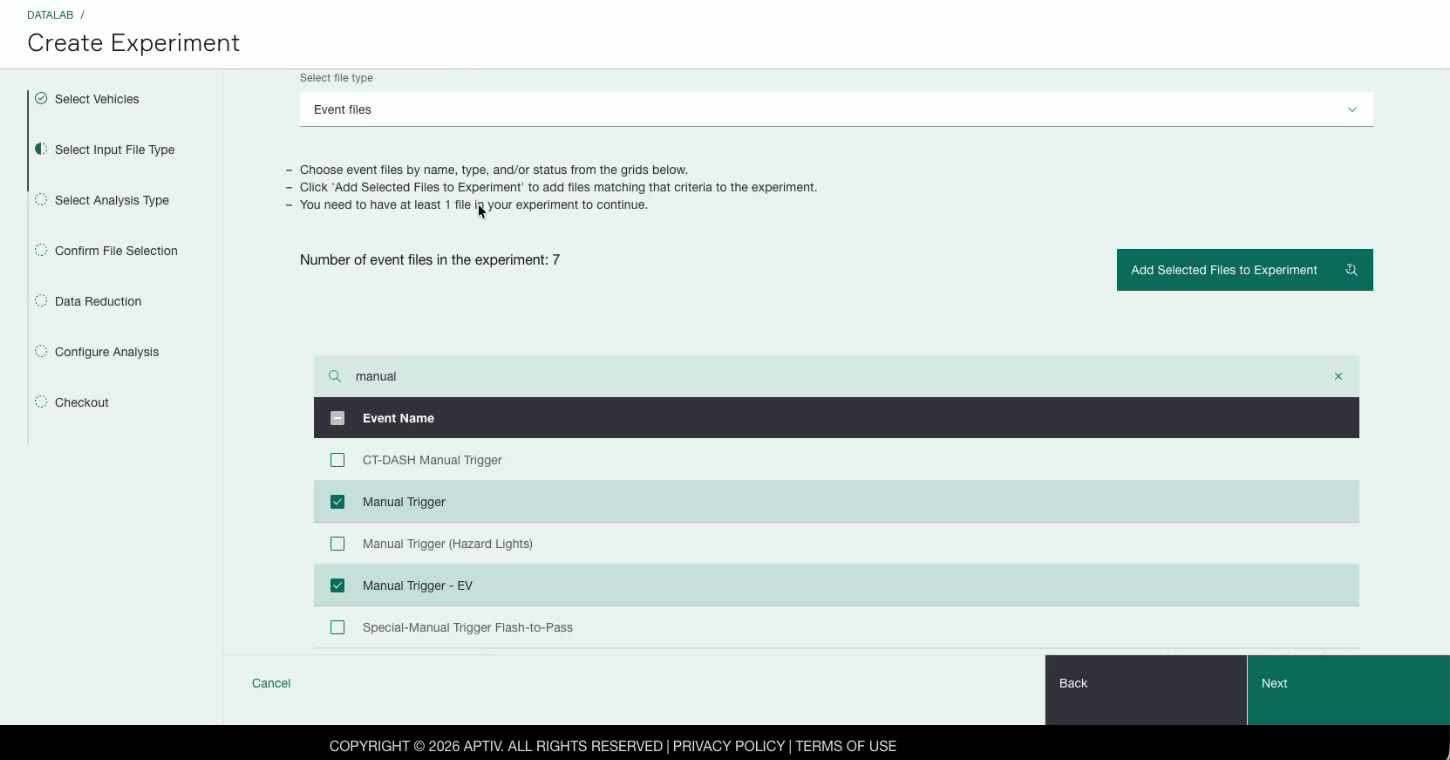
Add trip detail files
Trip detail files use conditions rather than named items.
- Choose Trip detail files from Select file type.
- Under How should the below search criteria be combined?, choose AND to require every condition, or OR to accept any one of them.
- Build a condition from a parameter, an operator, and a value. For example,
runtime>0adds every trip detail with a runtime above zero.
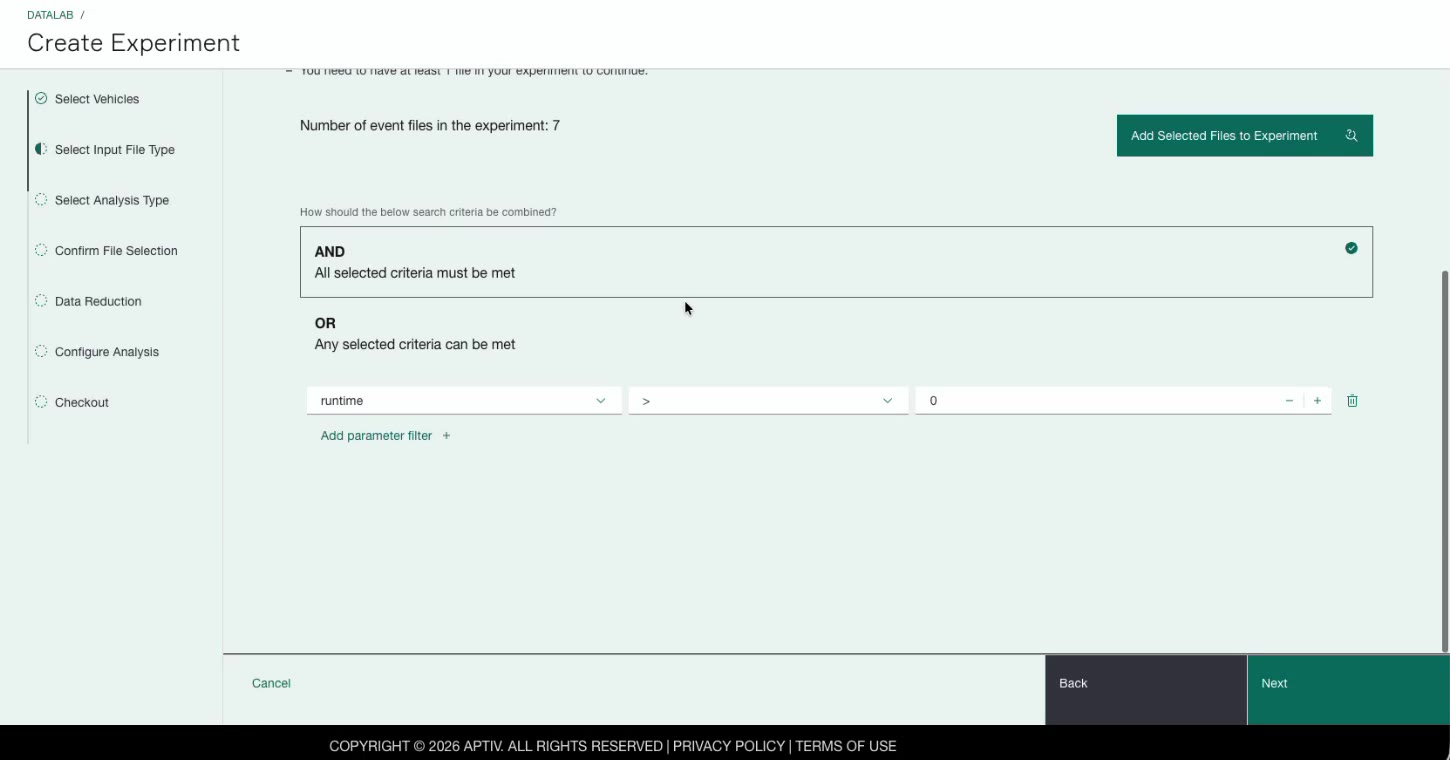
- Click Add parameter filter + to add more conditions.
- Click Add Selected Files to Experiment.
Add charge trip files or CAN log files
These have no additional filters. Choose the type and click Add Selected Files to Experiment to add everything available for your selected vehicles and dates.
You need at least one file in the experiment before Next becomes available.
Step 3: Select Analysis Type
Choose what DATALAB should do with the files you selected.
Under FILE OPERATIONS, pick one:
- Concatenate Files. Merges your recordings into a single sequential timeline. Use this when you want one continuous file covering a whole test sequence instead of a folder full of separate recordings.
- Download Files. Exports the files as they are, without additional processing. Use this for a bulk download.
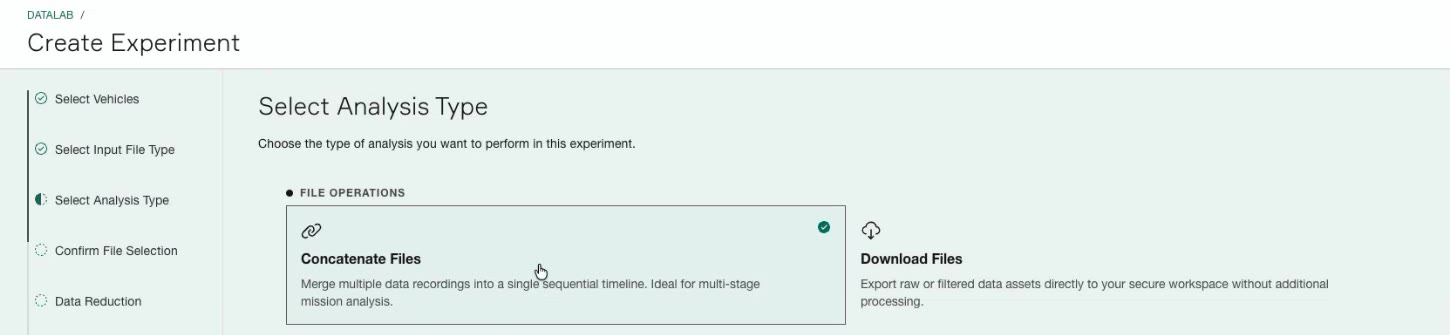
Click Next.
Step 4: Confirm File Selection
Review the files that will go into the experiment. The heading shows Number of files in the Experiment.
To drop a file, select it in the grid and click Remove Selected files. The count updates as you remove files.
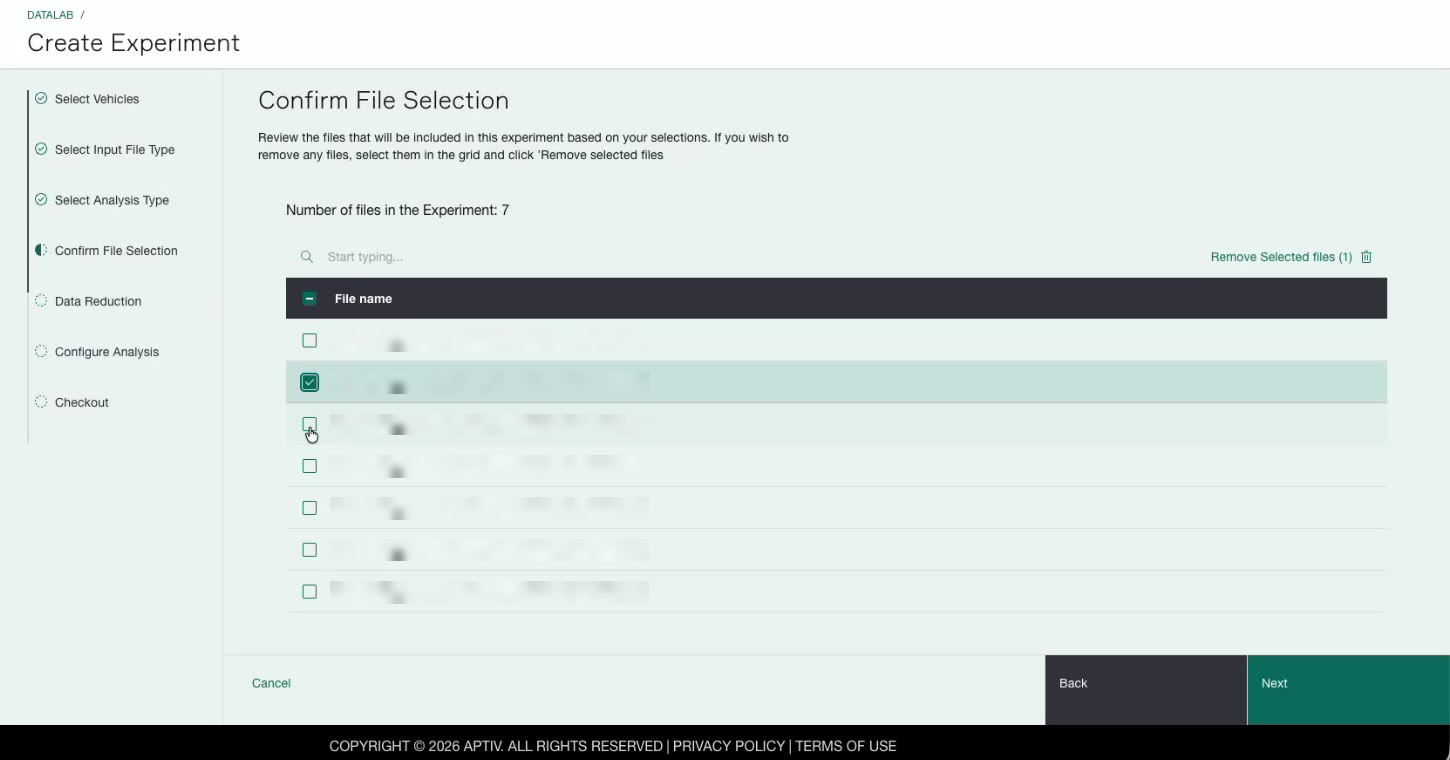
Click Next when the list is right.
Step 5: Data Reduction
This step is optional, and it is where most of DATALAB's power is. You can leave it alone and click Next to keep everything.
Data reduction has three parts:
- Parameter Library and Parameters in the output control which parameters, meaning which columns, end up in your output file.
- Geofence filtering and Conditional Filtering control which data records, meaning which rows, end up in your output file.
Because there is a lot here, it has its own page. See Reduce the data in an experiment.
Step 6: Configure Analysis
Set how the output is written.
Fill Data Gaps. Your files are time series data, and not every parameter updates at the same rate. If one parameter reports every second and another reports every five seconds, the slower one leaves gaps.
- Enabled carries the last known value forward to fill each gap, so every parameter has a value on every row.
- Disabled leaves the gaps empty, so a parameter has a value only on the rows where it actually reported.
File Row Limit. The default is 100000. If your experiment produces more rows
than this, the output is truncated at the limit and the remaining rows are
dropped. Raise it if you need more, but keep in mind that very large outputs get
slow to produce and to open.
DOWNLOAD FORMAT. Select one or more of CSV (Comma Separated), MAT (MATLAB Data), and MDF4 (Measurement Data).
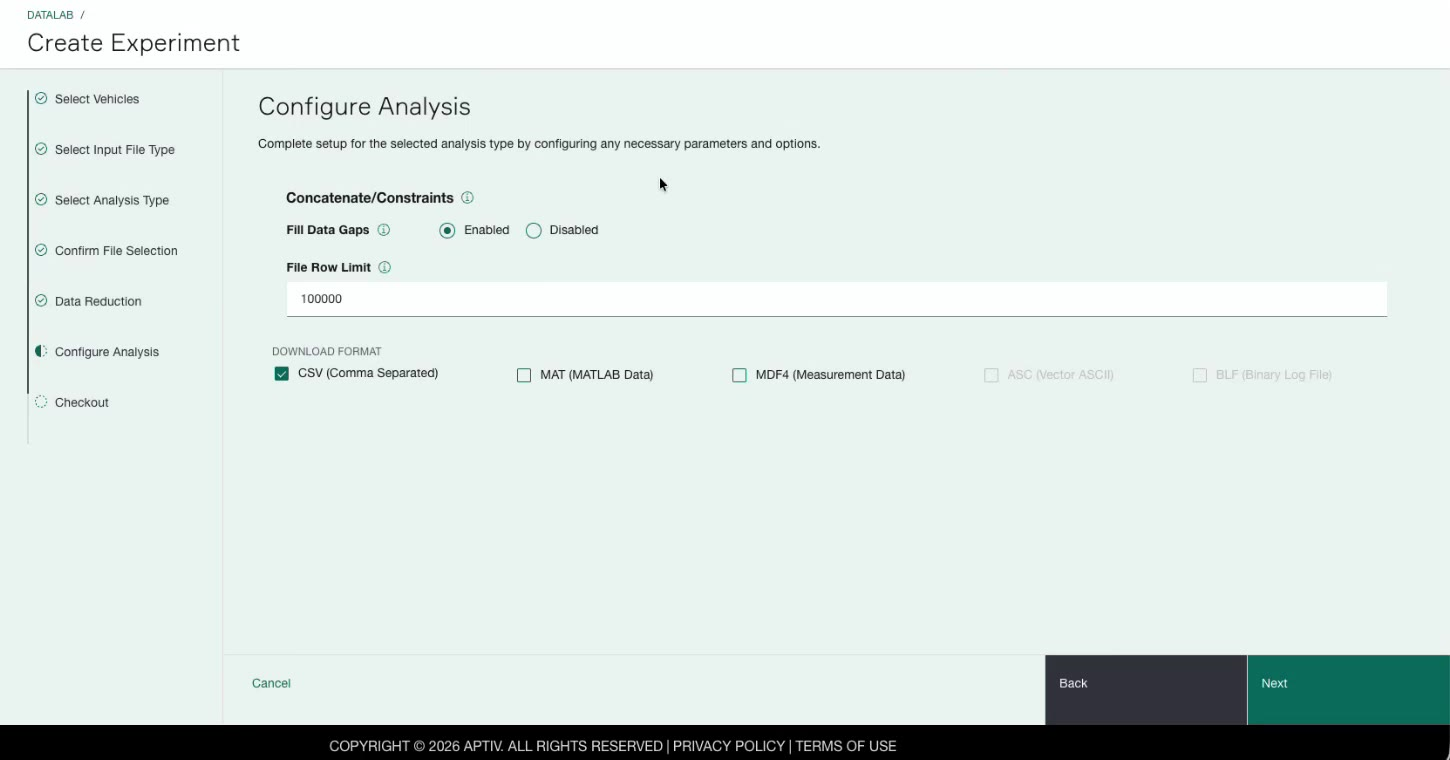
Click Next.
Step 7: Checkout
Review your setup and start the experiment.
- Enter an Experiment Name. This is required, and it is how you will find the experiment later, so make it specific.
- Optionally add Comments describing the run and its setup.
- Check the summary. It is grouped into three sections:
- DATA SOURCING: date range, number of vehicles, file type, number of files
- ANALYSIS: operation type, operation, download format, fill data gaps, file row limit
- DATA REDUCTION: parameter action and the parameters involved, number of geofence filters, number of conditional filters
- Click Create experiment.
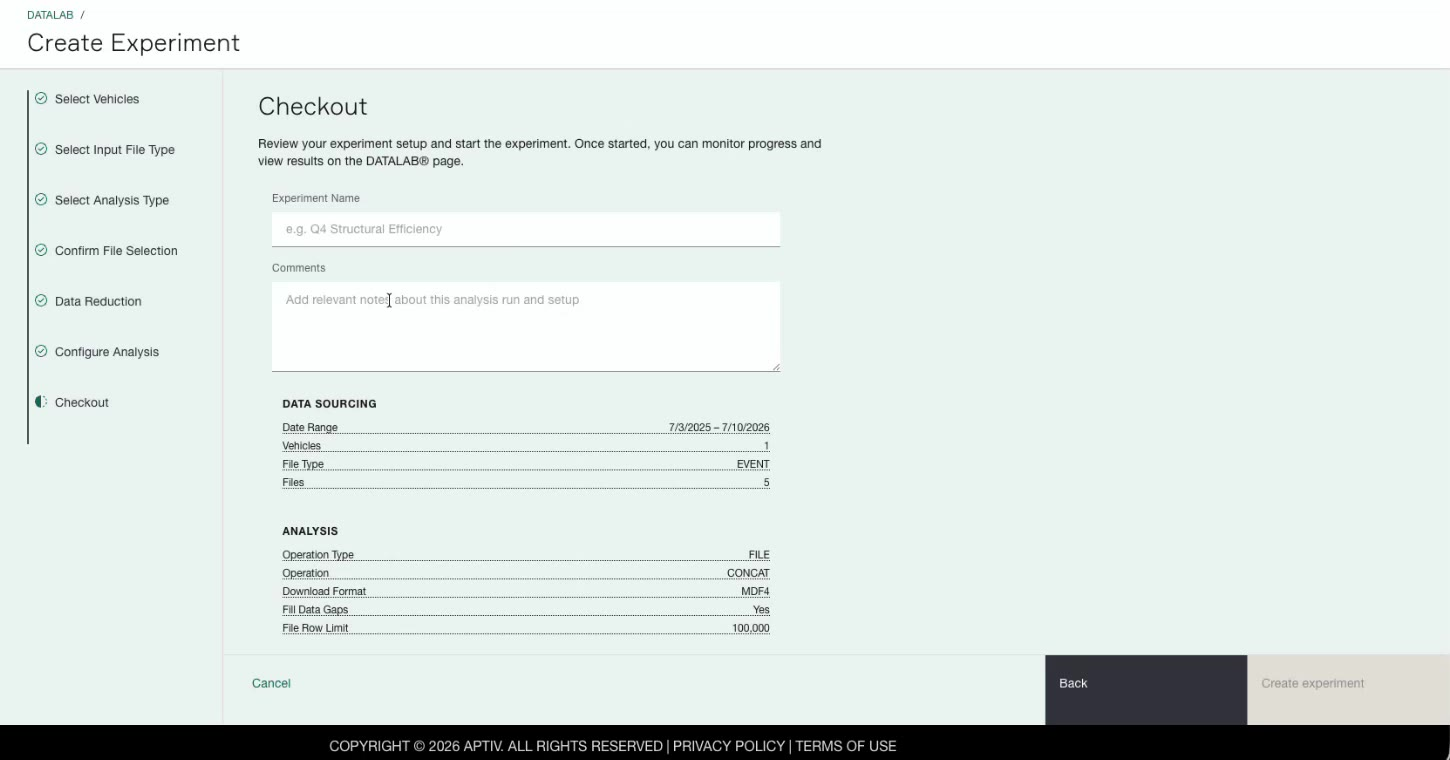
Qualifier returns you to the DATALAB page, where your experiment appears in Experiment History. See Manage your experiments for what happens next.